Image3 min read
How to Compress Images Without Making Them Look Bad
Shrink JPG, PNG and WebP images for email, upload forms and websites. Which quality setting to use, when to resize, and when to switch format.
By the ZapMorph team
On this page
Just want it done?
Open the Image Compressor — it runs in your browser and nothing is uploaded.
"File too large. Maximum size 2 MB." If you've ever applied for a passport, a job or a university place online, you've seen some version of that message. Phone photos are 3–8 MB these days, and screenshots aren't much better.
Compressing them properly takes about 30 seconds. The trick is knowing which of three levers to pull.
The three levers
- Quality. How much detail the encoder throws away. Lower means a smaller file. Photos can go surprisingly low before you notice.
- Dimensions. A 4000-pixel-wide photo has 4× the pixels of a 2000-pixel one. Shrinking the size is often the biggest single saving.
- Format. PNG is lossless and heavy. JPG and WebP are much lighter for photos.
Most people only touch the first lever and wonder why the file is still huge. Pull all three and you'll easily hit any limit.
How to compress images with ZapMorph
1. Open the image compressor
Go to the image compressor. It takes JPG, PNG and WebP.
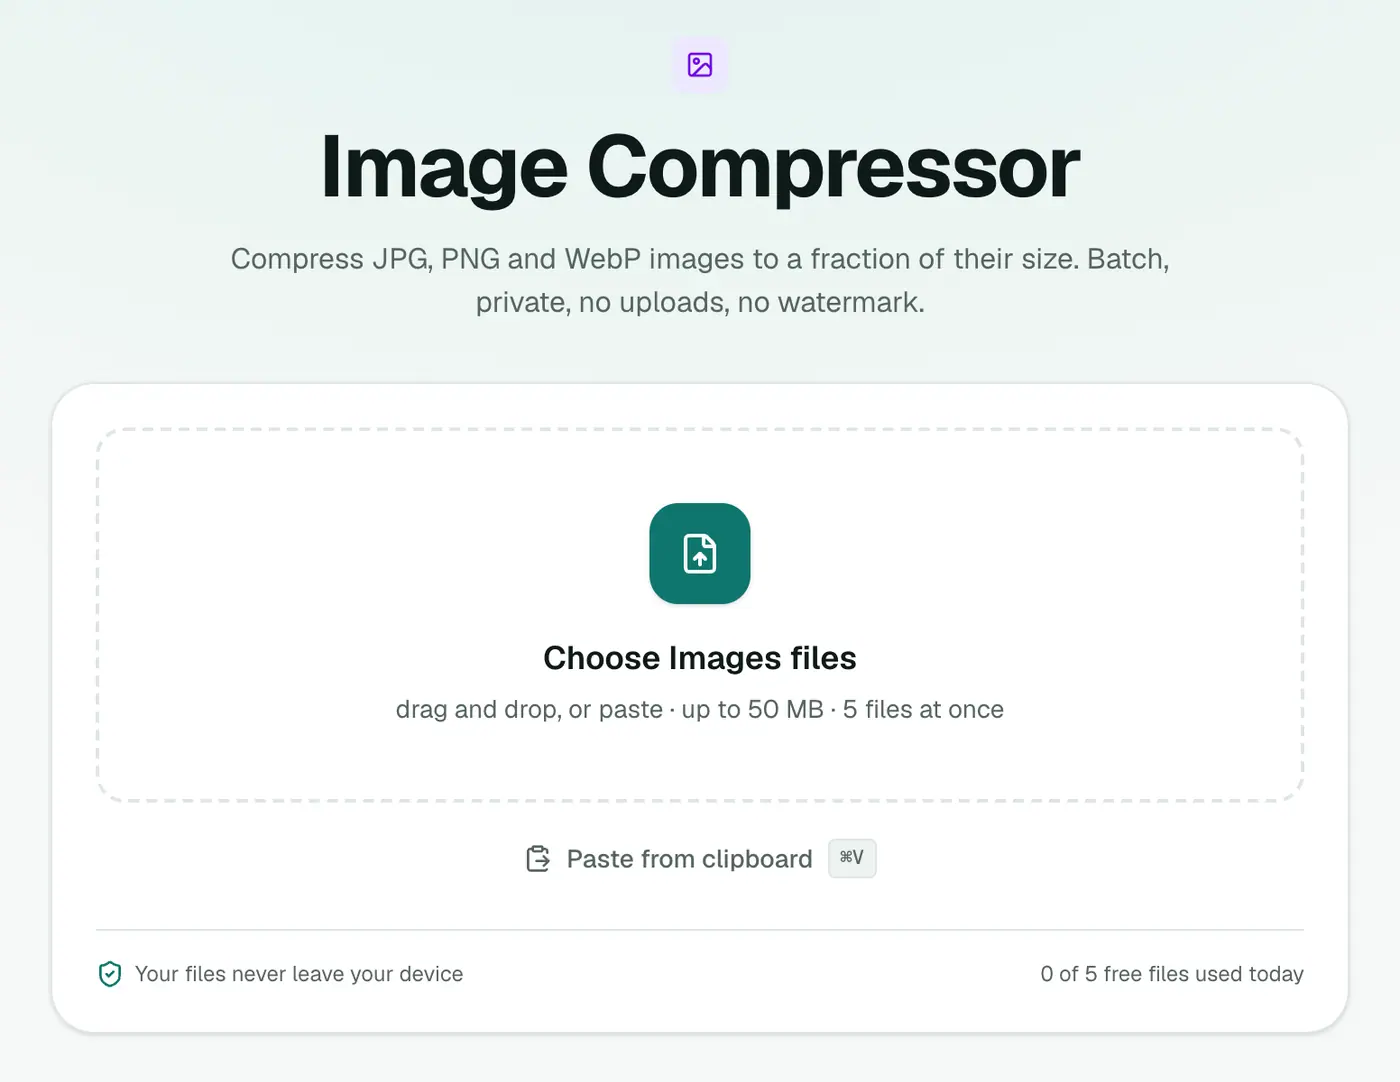
2. Add images and choose settings
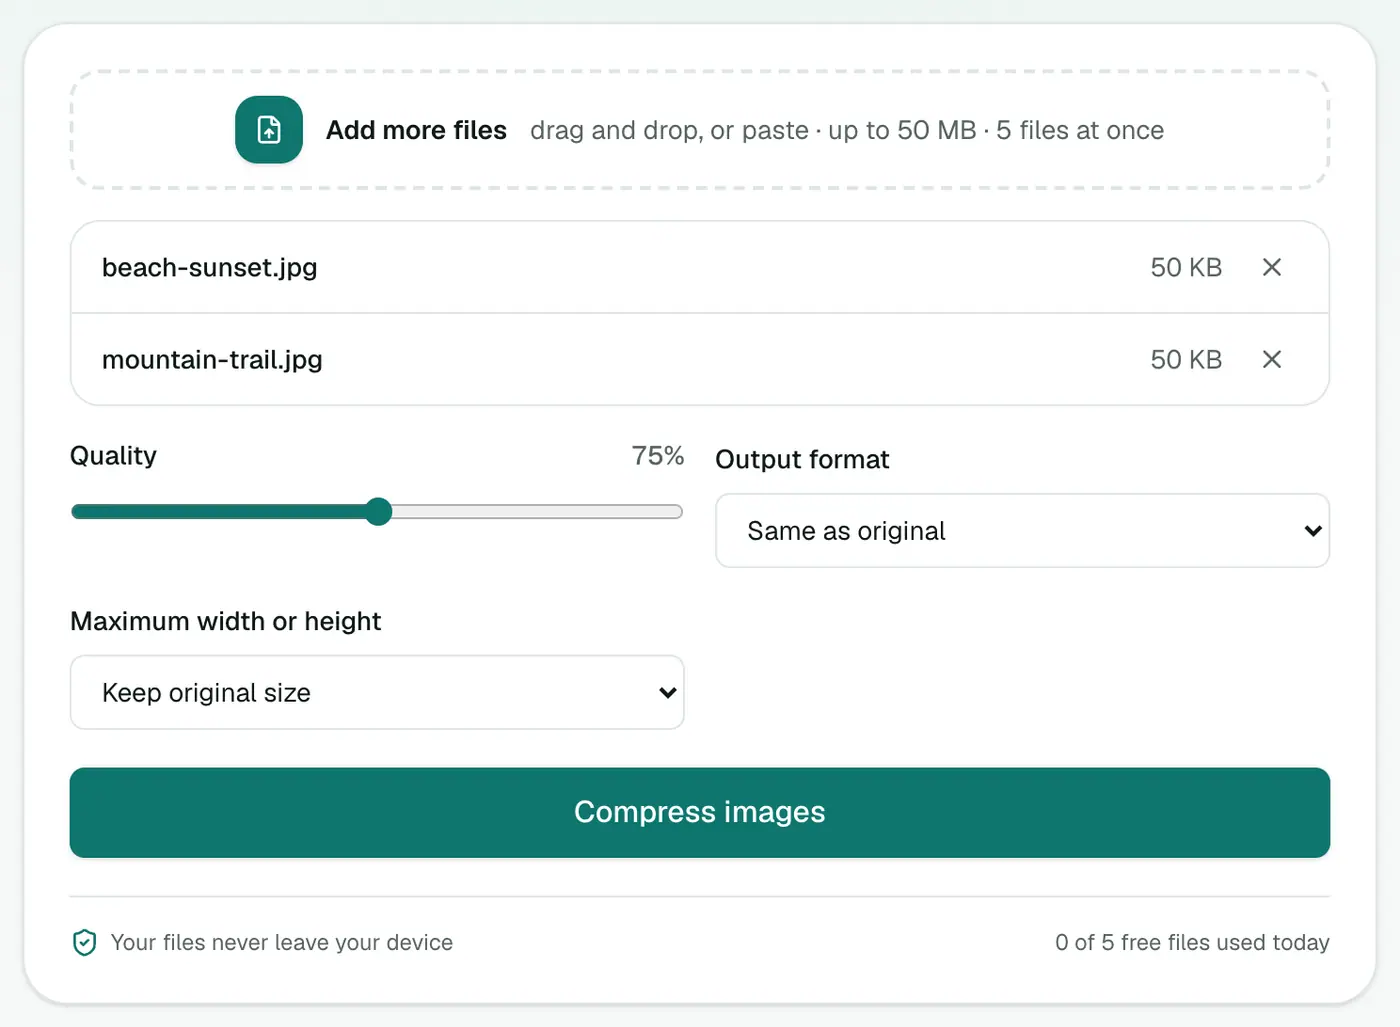
Drag in your images, then set:
- Quality: starts at 75%. Fine for photos. Raise it for screenshots with text.
- Output format: "Same as original", JPG (smallest for photos) or WebP (smallest overall, best for websites).
- Maximum width or height: keep the original size, or cap it. 1600 px is plenty for screens; 1280 px or 800 px for forms and email.
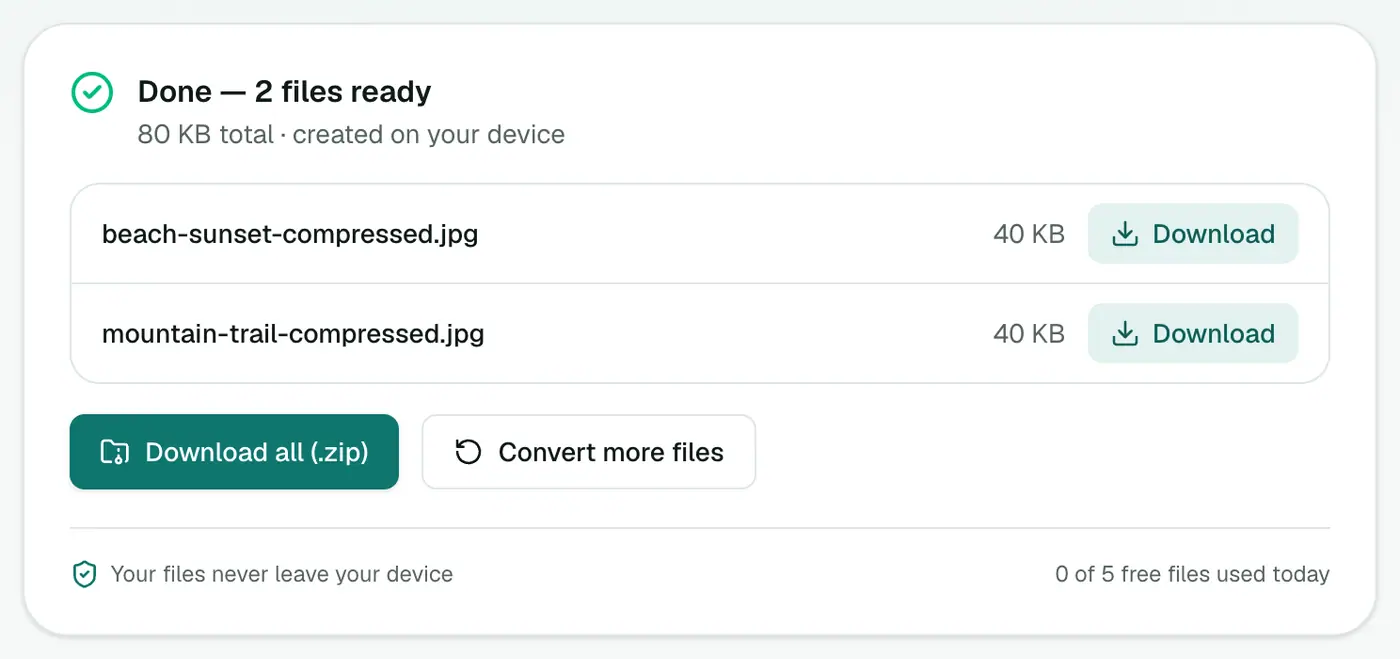
3. Compress and download
Click Compress images. The results show the new size of each file, so you can check you're under the limit before downloading.
Recipes for common situations
| Goal | Format | Max size | Quality |
|---|---|---|---|
| Government or job portal (under 1 MB) | JPG | 1600 px | 75% |
| Strict form limit (under 200 KB) | JPG | 1280 px or 800 px | 65–70% |
| Email a batch of holiday photos | JPG | 2048 px | 75% |
| Website or blog images | WebP | 1600–2048 px | 75–80% |
| Screenshots with small text | Same / WebP | Original | 85–90% |
Mistakes to avoid
- Compressing a compressed image again and again. Each pass loses a bit more. Start from the original.
- Using PNG for photos. Switch to JPG or WebP and the file will drop dramatically.
- Going too far on text. Below about 70%, small text in screenshots gets fuzzy halos. If it's a document, consider making a PDF instead.
Other ways
- Phones: most share sheets let you choose a smaller size when emailing photos (on iPhone, Mail asks "Small, Medium, Large, Actual Size").
- Windows Photos has a Resize option in its menu that saves smaller copies.
- Mac Preview: Tools → Adjust Size, then File → Export with a lower JPEG quality.
These work well for one or two images. The compressor is faster for a batch, and it shows you the final sizes before you download.
Typical results
| Image | Before | After (JPG, ~80%, 2048 px) |
|---|---|---|
| 12 MP phone photo | 3–5 MB | 300–600 KB |
| 4K screenshot (PNG) | 4–8 MB | 400–900 KB as JPG or WebP |
| Product photo for a shop | 2 MB | 150–250 KB |
Results vary with detail and noise, but large savings are normal.
Size limits you'll often meet
| Where | Common limit |
|---|---|
| Email attachments | 20–25 MB per email |
| Job and visa application forms | Often 200 KB – 2 MB per image |
| WordPress uploads (default hosting) | Often 2–64 MB, set by your host |
| Website images (for speed) | Aim for under 200 KB each |
Check the exact limit on the form you're using.
Privacy bonus
Compressing re-saves the image in your browser, which drops hidden metadata such as GPS location and camera details. That's useful before posting photos of your home online.
The short version
Cap the dimensions, pick JPG or WebP, and set quality around 75%. The image compressor does all three in one pass. If you only need different dimensions without changing quality, the image resizer is the better tool.
FAQs
What quality setting should I use?
75% (the default) is a good all-rounder. Photos usually look the same down to 70%. For screenshots with small text, stay at 85% or above.
Why is my compressed PNG barely smaller?
PNG is lossless, so "compressing" it can only do so much. Switch the output format to JPG or WebP for photos, or reduce the maximum size.
How do I get an image under a specific size like 200 KB?
Set a maximum width or height (1600 px or 1280 px is a good start), choose JPG or WebP output, and lower the quality step by step until it fits.
Are my images uploaded?
No. Compression happens in your browser, so private photos and documents stay on your device.
Does compressing remove location data?
The compressed image is re-encoded, so most EXIF metadata, including GPS, isn't carried over.
Can I compress images on my phone?
Yes. The compressor works in mobile browsers. Pick photos from your gallery and download the smaller copies.
Will compression change the image dimensions?
Only if you choose a maximum width or height. With 'Keep original size', only the file size changes.
Try the Image Compressor
Free to start, no install, and your files never leave your device.